ShareThis

Showing posts with label Simon Says Stamp Card Kit. Show all posts

1/29/14

your my type

Hello Friends, How are you doing? Braving the cold or hot temps? Today I am popping with a super quick post with a card and two butteries for my pin board. 
The sweet typewriter is one of the stamps from Simon Says Stamps newest release. The flowers are from the February Card Kit.
I always enjoy stamping a background especially when the ink matches the paper. Love this "Sea Glass ink!" Note: I carried the stamped background pattern onto the white card stock.
This Micro pen made it possible to draw letters on the typewriter keys. Wink of Stella pen was used on the heart and then I applied Glossy Accents to the keys and heart.
For each image I colored on my card ... I stamped an extra image to color on a blank butterfly for my pin board. The typewrite is from this stamp set.
I masked off the flowers when I created this butterfly and colored all the images for today with Copic markers. You can find the flower stamp set here. Let me know if you have any questions and a big thanks for your visit today. Hugs, Kathy 
.   
  
P.S. Did you see the February Card Kit Giveaway here?

SUPPLIES USED ON MY CARD. click on any link: 


12/10/13

put wings on it

Hello Friends, Are you experiencing snow and or sleet in your part of the world? I know on the east coast we are expecting a big storm today so we will see what actually happens. Snowy days are a good day to craft and to try something new, fun or different. How about adding wings to a BATTERY? I took the 
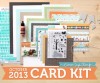
"Paulina" butterfly, cut it in half and jazzed up the butterfly wings. The sentiment and battery are in the December Card Kit or can be purchased individually here.
Once the embossing paste dried I added some ink to fill in the other areas of the butterfly wings. If you happened to notice the die cut I used on my card it's from Spellbinders
This 
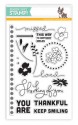
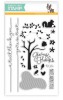
snowflake stencil I used on the wings & for the background is a great size . I thought I would share a photo before the clear 
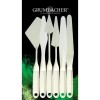
embossing paste dries. I just love this stuff .. the TEXTURE is just awesome!! You can use almost anything to apply the paste but, if you use a palette knife I think it's easier and more efficient.

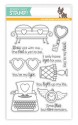
Why stop at one card with the fun battery stamp...so I designed one more quick one.
When my kids were small I loved it when the batteries were included with a gift. The background was stamped with this  & the batteries were colored with some Copic markers. The card shape is called, "Rounded Squares".
As you might imagine glossy accents was the perfect finish to the batteries.
 The December Card kit has some nice and thin washi tape that I used next to the small strip of red paper on the card.
Thanks for your comments during the hop. If you missed the hop you still have time to win lots of gift vouches. Check it out here.
Thanks for your visit today :) Stay warm and dry. Hugs, Kathy


SUPPLIES USED ON MY CARDS:
(click on any of the photos below)

9/30/13

october card kit from simon says

Hello Friends, Anything new in your neck of the woods? Have you seen any of the leaves change color yet? Why wait for that when you can stamp some fall foliage with this awesome stamp set that's included in the October Card Kit (also available separately). Octobers Card Kit has the wonderful surprise elements in the kit that I am always talking about PLUS these NEW Lawn Fawns papers & gorgeous sequin pack.
Click here to see my other fall tree card. 

Click here if you have questions about the Card Kit or if you want to subscribe. Click here to order. 
I love the versatility of "Giving Thanks" and I look forward to creating a naked tree in the snow for winter or a bright green tree in the spring etc. :)
Below is a mini tutorial to create a bright day with the mountains reflecting in some crystal clear water. 
Photo 1: Apply Mowed Lawn with a dauber using the stencil.
Photo 2: FLIP the stencil to create a reflection in the water using the dauber with two different blue distress inks.  
Photo 3: Use some sticky notes or this stencil to fill in the gap between the hills and the water. 
 Photo 4: Add a little more distress ink in the corners. Stamp the tree & leaves. Use this same stencil to create the clouds. 

Let me know if you have any questions...please send me an email so I can help you. Have a great day! Hugs, Kathy

P.S. Last chance for Oct. Card Kit Giveaway here? Sorry just checking :)

CARD SUPPLIES & LINKS:

Related Posts Plugin for WordPress, Blogger...